Permission Templates
The Permission Templates page lets you build saved permission sets that can be reused when setting up or updating users. Use templates when several people should have the same menu access, page access, scanner access, or customer access.
Navigation
Go to Administration > User Management > Permission Templates.
What the page does
The Permission Templates page stores saved permission sets that can be applied to new and existing users. Templates are a good starting point when several people should share the same access, such as purchasing, sales, warehouse, or administration roles.
The page opens with a template dropdown. From there you can pick an existing template to edit or choose Add New to create a new one. After a template is selected, the editor opens so you can name the template and choose permissions.
Templates can be applied while creating or editing a user from the Template dropdown on the user profile window.
Starting from the template dropdown
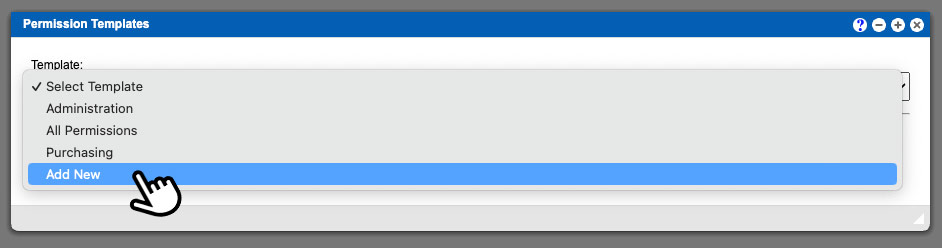
When you first open the page, use the template dropdown to select an existing template or choose Add New from the bottom of the list.
When creating a brand new template, the dropdown shown on saved templates is not displayed yet. That dropdown is only available after a template already exists and lets you quickly move to another template for editing.
Permission tabs
Menu
Controls which menu items the user can open.
Page
Controls access to pages and actions that may not be directly shown in the menu.
Scanner
Controls scanner-only permissions.
Customers
Limits which customer records a user can work with.
Email Alerts
Controls which email event subscriptions are included in the template.
Component and Fulfillment
Depending on the system setup, the page can also show component and fulfillment permission sections.
How to create a template
- Open the dropdown
On the Permission Templates page, open the Template dropdown.
- Select Add New
Choose Add New at the bottom of the list.
- Name the template
Enter a clear template name. This field is required.
- Turn permissions on or off
Use the tabs and permission blocks to choose which items should be included.
- Use Toggle All when helpful
Each permission section has a Toggle All button to quickly select or clear that section.
- Save the template
Click Save Template. After saving, the page reloads and confirms the template was saved.
Template editor walkthrough

Use the numbered example above to orient yourself in the template editor.
- Use the template selector when available
On existing templates, the dropdown at the top lets you switch to another saved template for editing.
- Enter the template name
The template name is required and should clearly describe the role or access level the template is meant for.
- Save as you go
Be aware of the save button location so you can save your progress after naming the template or updating permissions.
- Review each permission tab
Like the user profile window, the template editor uses tabs to group menu, page, scanner, customer, and other available permissions.
- Use Select All when needed
Each permission section includes a green Select All button to quickly turn on all permission blocks in that section.
How to edit a template
- Select an existing template
Choose the template from the dropdown at the top of the page.
- Update the name or permissions
Change the template name or update the selected permission blocks.
- Save your changes
Click Save Template to update the template.
Templates are meant to speed up user setup. After a template is saved, it can be applied when creating or editing users.
The permission blocks work the same way they do on the user profile window: active permissions are highlighted, while inactive permissions remain unselected.
Only users with permission to edit users can open and save permission templates.